
This is UltimateRPA Documentation
The UltimateRPA robot works with the application in the same way as a regular user. For example, the robot can click buttons under the mouse pointer and use keyboard shortcuts. In this tutorial, we look at how it works.
The following code shows how to setup the environment and run RpaLoginTest app. Import the urpa module. With the function condition_factory, create the constant object "cf". Define the main function and set the debug mode ON through function set_debug_mode, so that the robot is run in debugging mode. This will highlight the GUI element found, with a green frame so you can be sure that you have selected the desired GUI element. The application path, in the argument of the function exec_app, may be absolute or relative to the script. Finally, use the method auto_close to configure the robot so that it does not close the running application when the script is completed. If you run the application through PyScripter with this setting, you must end it before running the robot again.
The path to an app "TutorialApps/RpaLoginTest.exe" is relative to the script file directory. The above code assumes the script is placed in the main directory of UltimateRPA tools. If your script is saved elsewhere, remember to change the path.
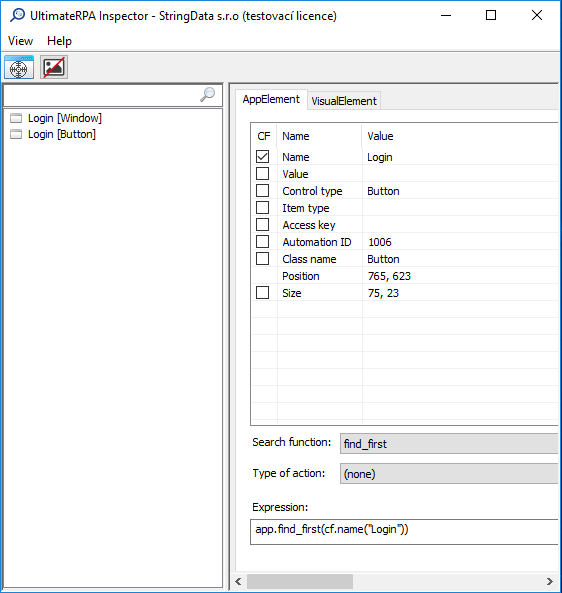
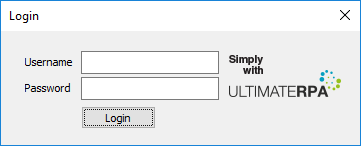
To demonstrate the mouse click simulation we will use the app RpaLoginTest. To indentify the GUI element "Login" button, run Inspector, grab the crosshair with the mouse and move it to the Login button in RpaLoginTest. Check the checkbox Name field.
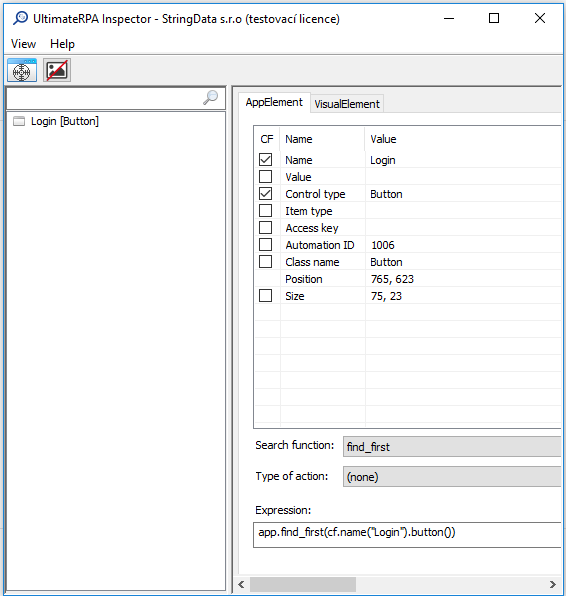
As you can see in the left-hand section of Inspector, the Name property with the Login value is not enough to find the required GUI element clearly. You must extend your condition factory to include another property. Check the Control Type field, too. In the Search function, select find_first. In the Type of Action, select send_mouse_click. Inspector generates the expression app.find_first(cf.button().name("Login")).send_mouse_click() in the Expression field. Copy this to your code. The method send_mouse_click places the pointer on the center of the GUI element and performs a mouse click.
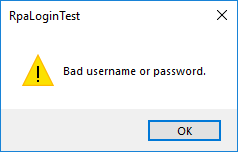
Run the robot using the keyboard shortcut (ALT + F9). Alternatively, select Run and then External Run in the PyScripter upper menu. The robot runs RpaLoginTest and clicks the Login button. The application then displays an error message indicating that the username or password is incorrect.
The method send_mouse_click has two optional parameters. The first is called action and is used to set the mouse action type. For example, you can decide whether you want to press the right or left button. By default, the robot presses the left mouse button. For an overview of all possible options, see set_default_mouse_action. The second parameter is for a position and allows you to select the pointer coordinates before the mouse click is performed. For more information, see send_mouse_click.
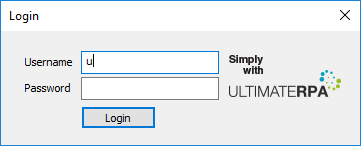
To demonstrate the key press simulation we will use the app RpaLoginTest. The following example types "u" in the Username field. To identify the GUI element for the edit box run Inspector, grab the crosshair with the mouse and move it to the edit box in RpaLoginTest. Check the checkbox Name field and Control Type. Then select find_first. Select send_key as the Type of Action. This generates the expression app.find_first(cf.edit().name("Username")).send_key(""). Use this expression and pass "u" as an argument to the method send_key.
Run the script. The robot will launch the RpaLoginTest application, frame the Username edit box in green (since the debug mode is ON) and will insert the letter "u" into the Username editbox.
You can also simulate keyboard shortcuts using the robot. For example, you can close the application with the keyboard shortcut ALT+F4. Replace the "u" string in the argument of the method send_key with the string "ALT+F4".
Rerun the script. The robot runs the application, finds the text field, and closes the application with the keyboard shortcut ALT+F4. However, the method send_key is not suitable for text or string input. For writing text in a GUI field, you may use the method send_text as described in the next section.
The function send_key is not suitable to insert text into a GUI element. This function only can send key combinations to the GUI element, thus inputting one character at a time. For inputting a string into a GUI element you can use the method send_text. This function will input a string into the GUI element. Let's attempt a practical case, again in RpaLoginTest. The following script inputs the username and password in the Username and Password edit boxes and clicks the Login button to log into the application. (The username is RPA_test_user and the password is 12345). To identify the GUI elements Username and Password edit boxes you may use Inspector. Set send_text as the Type of Action, copy the expressions into the code, and pass the login name and password as strings to be entered. Finally simulate the mouse click with method send_mouse_click on the Login button.
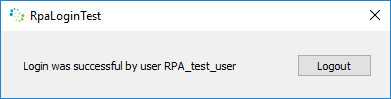
When you run the above script, the robot runs the application, fills in the username and password and logs in. A message appears indicating that the login has been successful.
The method set_focus is used to set the focus on the GUI element selected. The focus sets the GUI element as active. We will try to focus on the Login button in RpaLoginTest. Use Inspector to mark the button, as in the previous examples. As the Type of Action does not offer a set_focus option, set it to (none). Copy the expression generated into your code. Add to it the invocation of the method set_focus, so the code looks like this: app.find_first(cf.button().name("Login")).set_focus().
Run the robot. RpaLoginTest opens, and a dotted line is drawn around the inner edge of the button to indicate that the Login button has focus.
To fetch properties of the GUI elements like text value inside the edit text field, text value in the GUI label etc, the GUI element name, you may use the following examples. Below code snippets demonstrate some practical examples, this time using the RpaTableTest app. The following code launches the application. We do not need to run the app in debug mode. The GUI element properties (like name etc.) are written directly into the PyScripter log with the python expression print.
In the following example, you will print all the values from the first row of the RpaTableTest table to the console. Find the first row using the tool Inspector. If you do not know how to do this, please refer to the chapter Finding an element for assistance. In the row, find all text-type elements. Then, loop through each element and print out their name in the console using the method name.
The console records a lot of useful information. This is discussed in more detail in chapter Advanced Lessons. At this point, you only need to know that every print command in the script is written to the console. You can find the console in PyScripter – in the bottom window in the Output tab.

To obtain the GUI element value, you may use the method value.
The size of the image element on screen can be determined by the method size. With the help of Inspector, identify the image and create the expression app.find_first(cf.image()). When used in code app.find_first(cf.image()) returns an image object. To determine the size call the method size on this image object. The method size returns a tuple with two values (width, height) in pixels. To determine the position call the method [bounding_rectangle](urpa.AppElement.bounding_rectangle] on the image object to obtain the bounding rectangle (in screen coordinates). This method returns a tuple of four values (left, top, right, bottom) relative to the upper-left corner of the screen.
After running the above script, examine the console. You will find the required information there.

A list of all the methods that can be used over the GUI element can be found in the documentation of the class AppElement.
As a best practice, before a robotic script works on a screen of an application, make sure all the GUI elements of the screen are loaded. It may happen that a few application screen GUI elements take some time to load and the robotic script tries to access these GUI elements before that. To avoid this, identify several elements that appear on the screen among the last ones and use them as control elements in the script. By accessing the last loaded GUI elements first in the script you make sure that the application screen is fully loaded and ready for use.
After the form fields in a GUI are filled by the robotic script, it is recommended to verify all the input fields for the desired values, before the form is submitted. This is because while filling in the form fields the application may freeze or become unresponsive, which causes the robot to skip the input or partially fill the input fields. Before submitting the form you can access the form fields and run a check on the values they hold to verify the desired input.
A GUI element may be accessible through the robotic script but a user action may still not be possible if the element is not visible on screen. To perform a user action like a mouse click on such an element you must first make that element available or visible. One of the ways to make a GUI element available is to use the keyboard arrow keys or the TAB key using the method send_key to reach that element. Once an element is available on screen, the user actions may be performed.