This is UltimateRPA Documentation
UltimateRPA Scheduler is a scheduling tool used to repeat Queues at various user-defined time intervals and periods. Each Queue may contain any number of Tasks, which are run sequentially in the order in which they are queued within the Queue. A Task is primarily intended to launch a particular application. UltimateRPA Scheduler's basic function is to run UltimateRPA Robot with a debugged robotic script that simulates real user work. A key step when working with UltimateRPA Scheduler is to define a Task that is to run an application, most often UltimateRPA Robot. For each Task, various properties can be defined. These properties include the application to be run, the method to end the task when the defined timeout is exceeded, background execution and so on. With the Queue, the time or period when each task is to be rerun is defined. An important feature of UltimateRPA Scheduler is the ability to run only one Queue at a time. Queue and Task settings are stored in a file with the UltimateRPA-Scheduler extension.
UltimateRPA Scheduler is designed for operating systems Microsoft Windows 7 (NT 6.1) through Microsoft Windows 10 (NT 10.0). Scheduler is launched after the Scheduler.exe file is run.
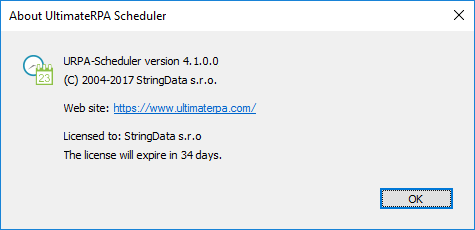
You may obtain the UltimateRPA license free of charge for non-commercial use, or test whether the tools meet your expectations and then switch to a license for commercial use. Both the commercial and non-commercial licenses are issued for one year and offer the same tools, features and documentation. If you opt for a non-commercial license, whenever you start up tools it will be validated against our license server. This is not the case with a commercial license. A commercial license is limited to one end device on which it is run, regardless of the number of robotic automations executed. Put simply, you can run dozens of robotic processes on one computer with a single license. There is no limit to the number of end devices covered by a non-commercial license. The full text of the General Terms and Conditions can be found in General_terms_and_conditions.rtf, in the directory where Scheduler.exe is located. To view license validity details, you need to go to the UltimateRPA Scheduler Help Menu.
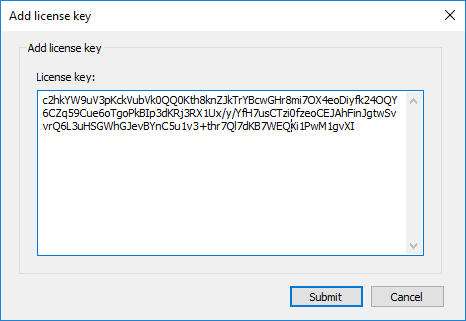
If license.lic is not located in the directory where Scheduler.exe file is present, after running the application you must enter a valid license key or the content of a valid license.lic file, into the "License Key" edit box in the "Add License Key" dialog, and then click Submit. If the license key is valid, clicking the Submit button will create a license.lic file in the directory along with the Scheduler.exe file and UltimateRPA Scheduler will run.
| Queue | A Queue represents a sequence of Tasks that will be run in the order in which they are queued. The Queue is mainly used to define the time of script execution or application run. The first Task starts at this time, the second one after the first has finished, the third after the completion of the second, and so on. |
| Task | A Task defines what to run and how to run it, whether it is an automation script for Robot or another application. A Task does not include the run date and time configuration. These parameters are defined at Queue level. |
| Activation period and time | The period and time of application activation, as declared in the Queue |
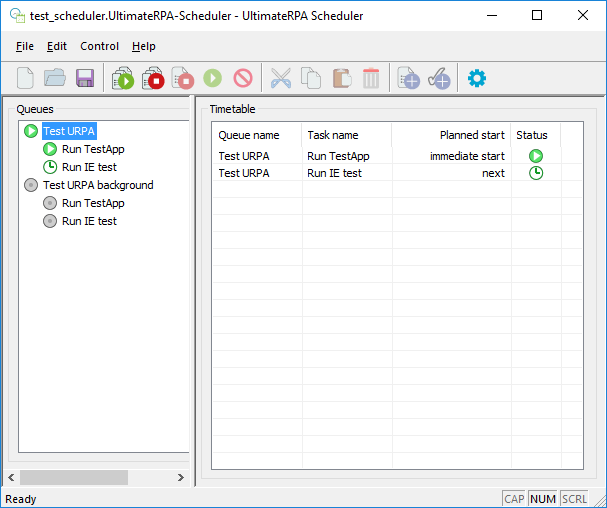
The largest part of UltimateRPA Scheduler's main window is taken up by the Queues group frame, containing Queues and Tasks trees, and the Timetable group frame, containing the current Task running schedule for enabled Queues. You can change the order of the Tasks marked in the Queues tree by dragging and dropping, and you can move individual Tasks between different Queues.
To create a new Queue, right-click in the Queues group frame and select Add Queue in the context menu. Alternatively, select Edit–Add Queue or click on the Add Queue Toolbar icon. A new Queue is added at the end of the Queues group frame items.
A Queue is always formed by a sequence of Tasks and runs independently. The Queue itself does not define the application to be run. The Queue only provides Tasks with a common name and molds them into a single structure of interdependent Tasks that are processed sequentially when the scheduling script is run. In the Queues group frame, the Queue is always the root of the tree. Each Task has its own settings independent of the way the Queue as a whole is configured. In the Queues group frame, both the Task and the Queue are always labelled with their own name in the tree. Within a Queue, Tasks are performed in succession and each Task waits until the previous Task is finished. This means two Queue Tasks cannot run at the same time.
To add a Task to a Queue, use the context menu option Add Task above the selected Queue. Alternatively, add a Task by selecting Edit–Add Task or click on the Add Task Toolbar icon. The Add Task option is available only after a Queue tree has been created or designated in the Queues group frame. This means that a Task cannot be created unless a Queue has been created. After one of these options has been selected, a new Task is added to the end of the Tasks list of the selected Queue.
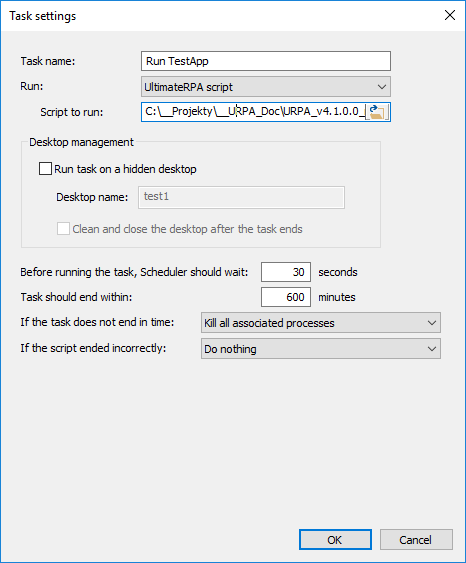
A Task is used to run any application that performs a particular job on the computer. A typical example is the launch of a robotic tool, such as UltimateRPA Robot. First, create a robotic script simulating real user activity and store it in its debugged form. The task here will be to run UltimateRPA Robot and play back the robotic script that has been created. An important attribute for each Task is the value of "Task should end within (min)". This attribute specifies the end of the time interval within which the Task application can be run.
The Queues editing window is used to edit a newly added or an already created and selected Queue. The editing window of an already created Queue is activated by left double-clicking or by right-clicking on the selected Queue and selecting the Edit ... context menu item. If a Queue is run, once the Queue parameters have been modified these changes are reflected in the list in the Timetable group frame. Whenever the Queue name is changed, this change is propagated to the Queues group frame.
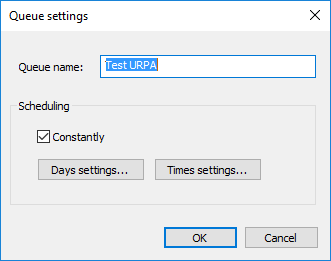
Day scheduling is used to define the days on which the Queue is to execute its Tasks, or to run the robotic scripts included in those Tasks. Active days can only be scheduled for a Queue. The scheduling of days cannot be set for individual Tasks; their active days are defined by the parent Queue. The default setting of active days is any time.
If Queue is to run only on certain days, these days must be precisely defined. Typically, days are repeated with a certain frequency (weekly, monthly, or yearly). Active days can be precisely defined on the left side of the Days Settings dialog box in the group frames "Meets one of the following conditions" and "Does not meet any of the conditions". On the right side of the Days Settings dialog box, the Preview group frame contains a preview of the currently set active days. In the lists on the left side of the dialog box, entries are added by right-clicking on the green plus icon in the Actions column and by setting conditions in the Condition Editor dialog box.
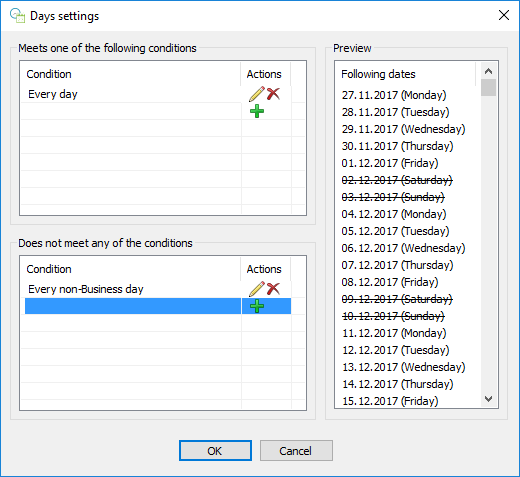
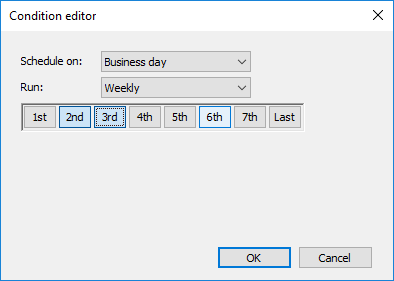
By configuring the controls in the Condition Editor dialog box, you can create the most frequently required daily schedules to activate the Queue.
After setting the All Days option in the Schedule On dropdown field, you can set values in the Run dropdown field.
After setting the Business Day option in the Schedule On dropdown field, you can set values in the Run dropdown field.
After setting the Non-business Day option in the Schedule On dropdown field, you can set values in the Run dropdown field.
After setting the Custom Days option in the Schedule On dropdown field, you can set user-defined days in the Run dropdown field.
If Queue execution needs to be set at different time intervals on different days, you must create a copy of the Queue and modify the execution times in that copy. As the scheduling of days and times is configured separately, it is impossible to create run settings at different times for different days in a single Queue. Once a Queue is created, the Start Times list is empty and you need to set time manually, otherwise Queue will not run after the "Turn on all queues" or "Turn on selected" option is enabled.
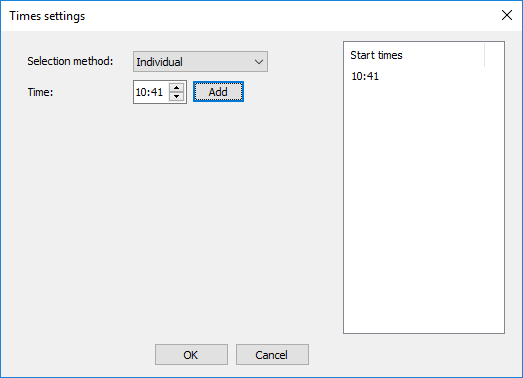
The exact Queue execution time can be defined by individual item (time) after selecting Individual in the Selection Method dropdown field. Use the Time edit box and the Add button to add a single Queue run time.
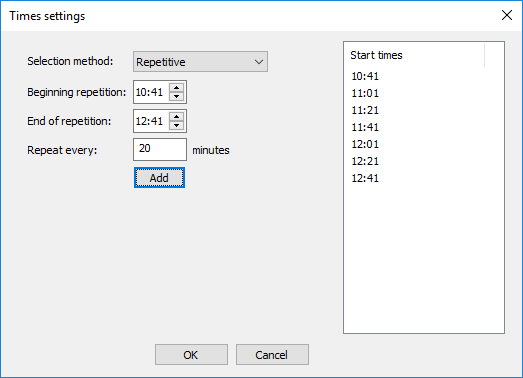
Another option is to make a mass entry using the time interval and the iteration cycle after selecting the Repetitive option in the Selection Method dropdown field. The beginning of the time interval is set in the Beginning Repetition edit box. The end of the time interval is set in the End of Repetition edit box, and the iteration cycle size (in minutes) is set in the Repeat Every X Minutes edit box. After the Add button is pressed, the set time will be added to the Start Times list on the right side of the dialog box. The Start Times list displays a list of the times set for the Queue to run. Selected times can be deleted by marking items in the Start Times list and pressing the Delete key.
The Tasks editing window is used to edit a newly added or an already created and selected Task. The editing window of an already created Task is activated by left double-clicking or by right-clicking on the selected Task and selecting the Edit ... context menu item. If a Queue is run, once the Queue parameters have been modified these changes are reflected in the list in the Timetable group frame. Whenever the Queue name is changed, this change is propagated to the Queues group frame.
Scheduler can run two types of tasks:
After this option Run – UltimateRPA script has been selected, the Task will be defined for running of UltimateRPA Robot and the robotic application, i.e. the Task will execute the robotic script.
Once the Run – Command option is selected, the option to launch any application via a Task is enabled.
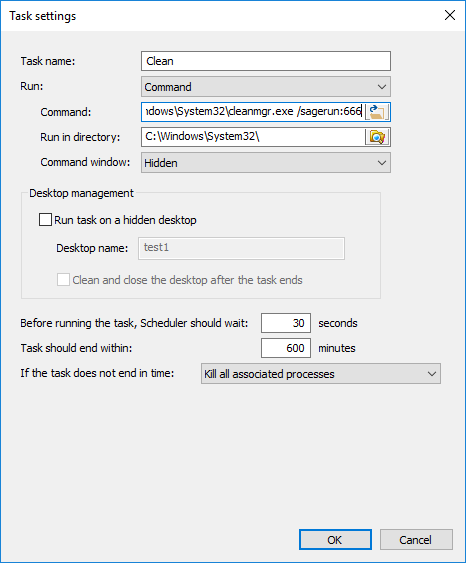
For the Desktop Management, Before running the task, Scheduler should wait, Task should end within, and If the task does not end in time controls, the same features and behavior as those for the setting of the Run – UltimateRPA Script option apply – see UltimateRPA Script Task.
Scheduling script execution is activated during the debugging of scheduling script by selecting Control – Turn on all queues (runs all Queues), Turn on selected (runs the Queues selected), or Start immediately (starts only one loop for the Queues indicated). For automated scheduling script execution, you must enter the path and name of the scheduling script as the first parameter, and the -startall or -autostart option as the second parameter, e.g. "D:\\UltimateRPA Tools\\Scheduler.exe D:\\UltimateRPA Tools\\Script.UltimateRPAScheduler -startall".
In the Timetable group frame, an overview of the scheduled running of Tasks for each Queue is displayed. The Planned Start column displays a description of the scheduled Task run time. The Status column displays the status following the previous Task processing (Running, Finished, Wait for the task run, etc.).
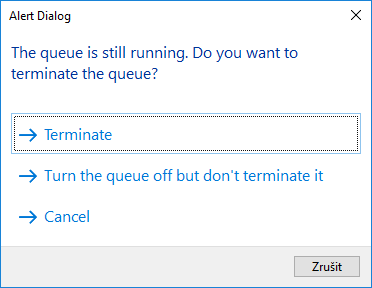
If the user enters a command to end the processing of a Queue with "running" status, an Alert dialog box is displayed. Scheduling script execution is ended by selecting Control – Turn off all queues (ends all running Queues) or Forbid selected (ends the selected running Queues). After the Terminate option is entered, the processing of the current Queue Task is ended immediately or, if the robotic script is run, the robotic application will be shut down immediately. The following Queue Tasks will not run and the Queue status "running" will be deactivated. After the "Turn the queue off but don't terminate" option is entered, the Queue status "running" is deactivated, but the last scheduled Queue Task loop will be completed. If the Cancel option is entered, the Queue will be processed according to the original schedule.
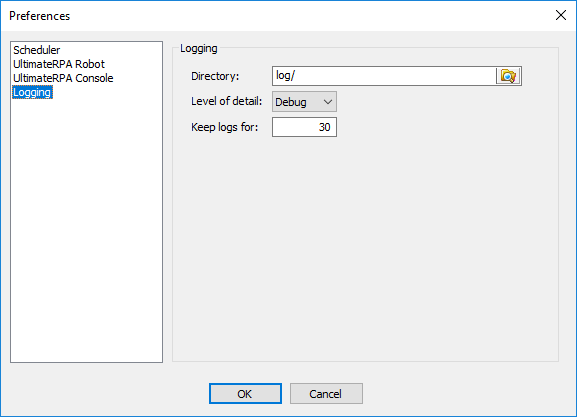
During scheduling script execution, an output log file is created with processing information. The output log file is created in the ".\\log\\" directory located in the same directory as the Scheduler.exe file. To create the output file, the user running UltimateRPA Scheduler must have the permissions to write to the directory where the Scheduler.exe file is located. The log file name consists of the name of the scheduling script and a timestamp in the format "_YYYY–MM–DD", matching the current date at the workstation. The output log file has the extension "log".
Each time scheduling script is run, output files older than one day and tied to the same scheduling script are compressed into a zip file.
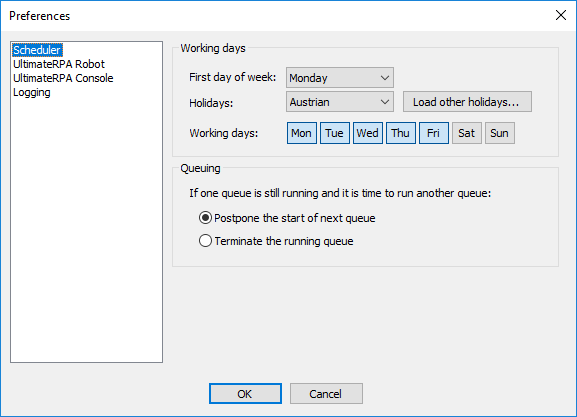
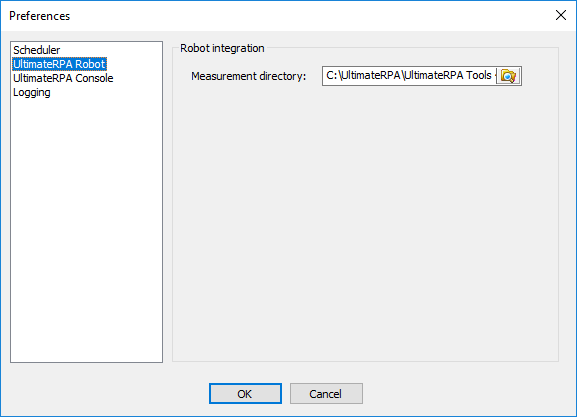
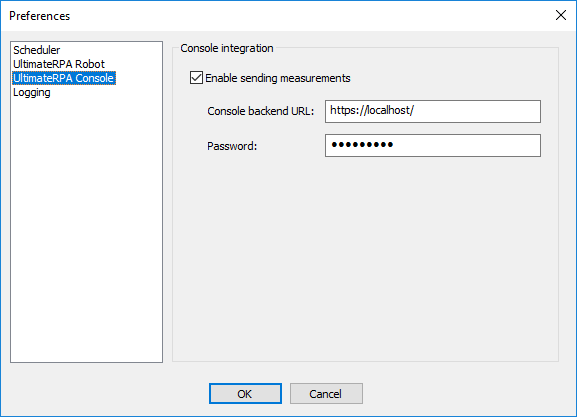
In the Preferences dialog box, which opens when you select Edit – Preferences, you can change the default (non-)working days setting, set the UltimateRPA Scheduler global behavior when the Queue timeout is exceeded, and set the properties of the output file containing information on UltimateRPA Scheduler activity during scheduling script execution.